The G Pen Connect E-Nail has been out for a little while now and the reviews are in: This. Thing. Rips.
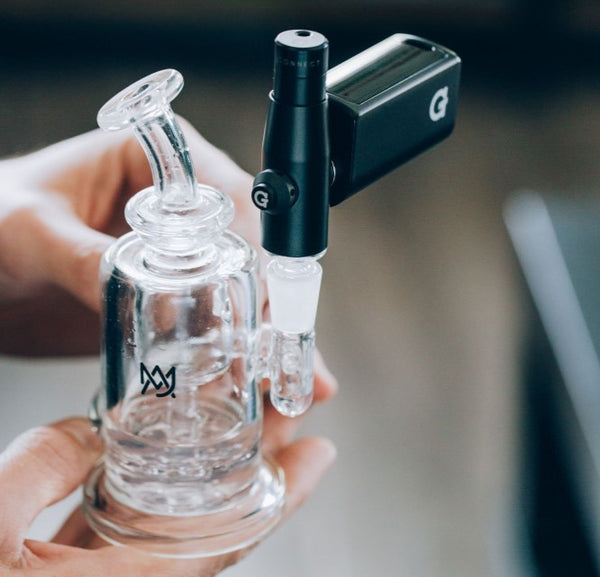
The G Pen Connect Vaporizer gives concentrate users looking to enjoy their rig setup a convenient way to create vaporization. The Connect essentially removes the need of a blowtorch and nail and makes it easier for just about anyone to enjoy smooth, highly potent rips from concentrates, without sacrificing the quality you get from traditional rigs.
A versatile tool, the Connect packs a lot of functionality in a small package. The Connect fits any bubbler with a 10mm, 14mm, and 18mm female fittings with a separate adapter. Let’s dive in and check out the G Pen Connect!
G Pen Connect

Features of the G-Pen Connect
- 850mAh Magnetic Battery
- Patented Reverse Airflow Technology
- Spring-Loaded Carb Release Button
- Ceramic Heating Element
- Magnetic Tank Cap
- Fits Any Water Piece With Glass-To-Glass Connection
Getting your G Pen Connect assembled out of the box is an easy process. The battery of the Connect has a magnetic connection that loudly snaps into place with it’s cylindrical counterpart that will house your concentrate and be slipped into the rig or water pipe of your choice.
Upon first glance the Connect’s shape is a little odd looking, especially compared to the one-piece designs were used to seeing from Grenco Science, but as will all G Pen products there is a nice functionality to the piece.The lone button on the G Pen Connect takes up the entire side of the battery, making it easy to use while connected to your water pipe.
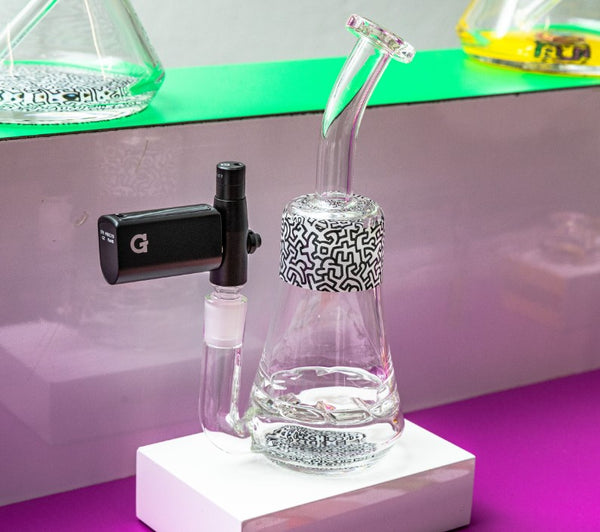
A ceramic bowl will contain your concentrate, making this a fantastic device for users who enjoy tasting every aspect of their material. Three voltages give different levels of flavor and vapor: 3.1v is for those wanting a tasty draw, 3.6v is the middle ground between flavor and density, and 4.1v will produce thicker vapor with a more substantial “throat feel”.
The “carb release” on the Connect functions the same way as an old-school carb cap. If you press the button as you’re taking a draw you’ll notice increased airflow, low draw resistance, and deep flavor.
How To Use The G Pen Connect
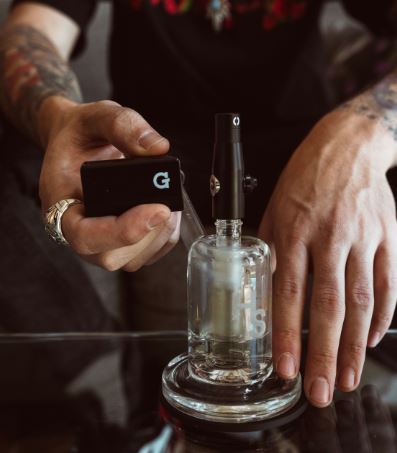
G Pen Connect Setup is as follows:
- Users will first insert the glass adapter into the device, and then place the device inside of their rig/water pipe
- Take the cap off of the tank and place your concentrate into the ceramic bowl
- Snap the battery into place alongside the cylindrical piece of the Connect
- Press the button 5 times to power the Connect on, and then 3 times to select a voltage level
- To begin heating press the button twice (for manual heating, just hold the button down for 15 seconds of heating)
- Once the heating process is complete, hold down the carb release button to ensure optimum airflow
- Inhale and enjoy
Conclusion
The G Pen Connect Vaporizer is compact, efficient, and able to provide a fantastic balance of density and flavor. The voltage options and absence of a giant flame are my favorite “plusses” of this device, as trying to find the right temperature with a torch can be a wishy-washy experience.
Customers who viewed this page also liked these pages:
- Dry Herb Vaporizer Collection
- Best Dry Herb Vaporizers
- Best Desktop Vaporizers
- Desktop Vaporizers Collection
- Best Portable Vaporizers
- Portable Vaporizers Collection
Top Related Portable Vaporizer Products:
- Davinci IQ2 Vaporizer
- Davinci IQC Vaporizer
- PAX Plus Vaporizer
- PAX Mini Vaporizer
- G-Pen Dash
- MIQRO-C Vaporizer
- Arizer Solo 2
- Firefly 2+ Vaporizer
